Clinic User Guide
Welcome to the Clinic features of TellMeWhereItHurtsNow! This guide will walk you through managing patient submissions and integrating the pain mapping tool directly into your clinic's website or patient portal.
Your Clinic User Interface
As a registered Clinic user, your experience is tailored for managing patient data efficiently. When you log in, you'll primarily interact with the Saved Models panel, which acts as your dashboard for patient submissions.
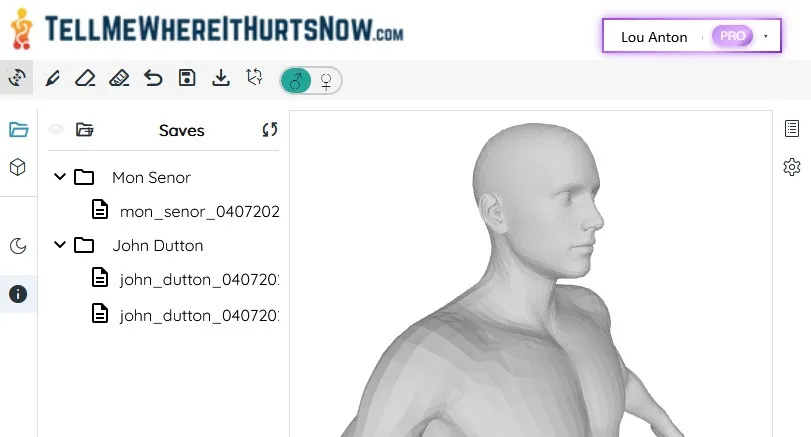
Fig 1: Your logged-in clinic profile in the header. Note the distinct purple styling if you are a Clinic user.
Accessing Patient Submissions
When a patient uses a link or button generated by you (see "Creating Embeddable Buttons" below) and submits their pain map, it is automatically saved directly into your clinic account.
You can find these submissions in the Saved Models panel on the left side of the main application screen.
- Automatic Organization: Patient submissions are automatically organized for you. The system attempts to create folders based on the patient's name (e.g., "Doe, John").
- File Naming: Inside each folder, individual submissions are saved as files. The file names typically include the patient's name and the date/time of submission to ensure uniqueness (e.g.,
Doe_John_MMDDYY_#). - Viewing Submissions: Simply click on a patient's file name in the Saved Models panel to load their highlighted pain map onto the 3D model viewer.
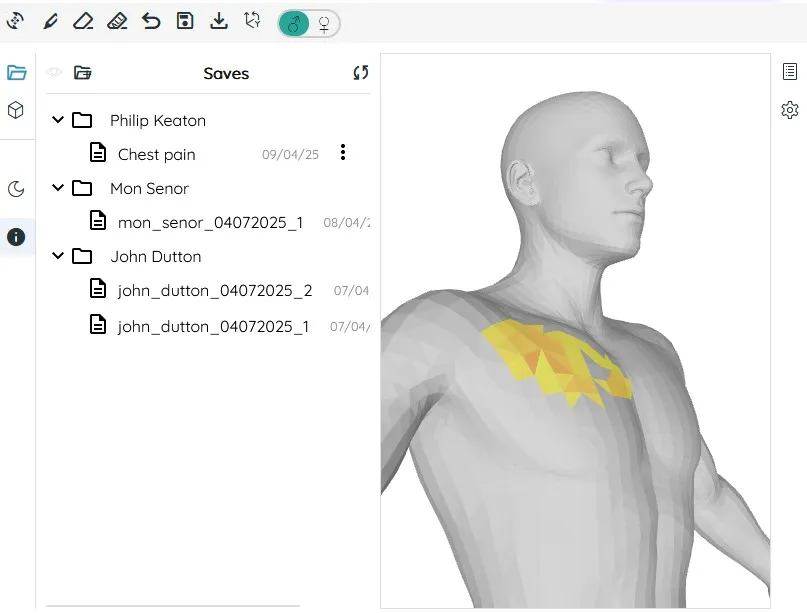
Fig 2: The 'Saved Models' panel showing automatically organized patient submissions.
Managing Patient Submissions
While submissions are automatically saved and organized, you have control over managing these files and folders within your account.
- Viewing: Click any file to load the pain map.
- Deleting Submissions: You can delete individual submission files using the trash icon next to the file name.
- Deleting Folders (Important!): You can delete entire patient folders using the trash icon next to the folder name. Please be aware: Deleting a folder will permanently delete all submission files contained within that folder and any subfolders. This action cannot be undone. A confirmation prompt will appear before deletion.
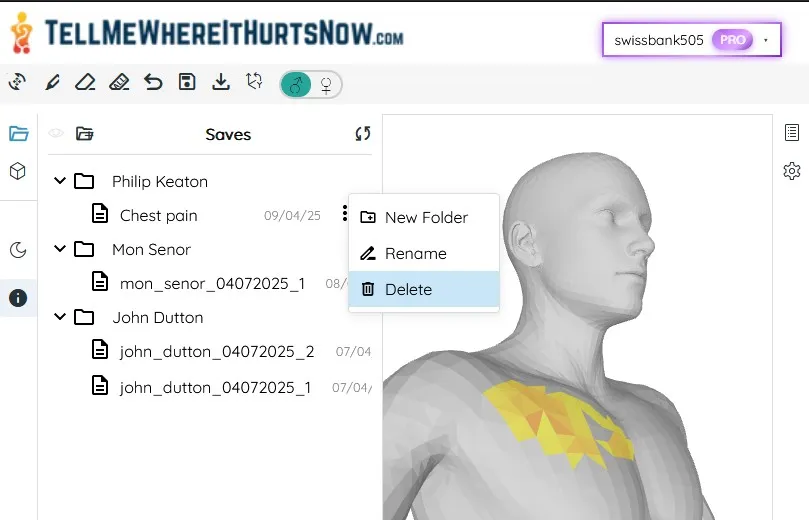
Fig 3: Deleting a patient folder (Trash Icon). Remember this permanently deletes all contained submissions.
Creating Embeddable Buttons
To make it easy for patients to submit their pain maps, you can generate an embeddable button or image link to place directly on your clinic's website, patient portal, or even in email communications.
Access the Generator:
- Click on your user profile name in the top-right corner of the application header.
- Select "Create Clinic Button" from the dropdown menu.
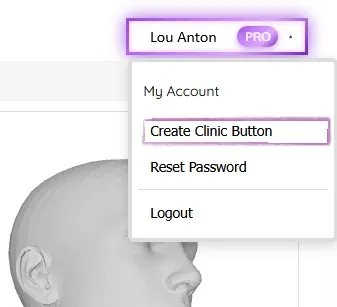
Fig 4: Accessing the button generator via your profile menu.
Customize Your Button:
- A modal window will appear where you can customize the appearance and text of your button or image link.
- Choose a Type: Select either a standard "Button" or an "Image" link (using our logo) by clicking the corresponding tab.
- Button Options (if 'Button' type selected):
- Label: Customize the text displayed on the button (e.g., "Tell me where it hurts", "Show Us Where It Hurts").
- Suggested Combinations: Choose from a variety of pre-designed color combinations that pair background and text colors for optimal appearance.
- Custom Colors: Fine-tune the button appearance by selecting specific colors:
- Button Background: Choose from color swatches or enter a custom hex color code.
- Button Text: Select the text color that best contrasts with your background.
- Logo Option: Check "Include logo in button" to display the TellMeWhereItHurtsNow logo alongside your button text.
- Image Options (if 'Image' type selected):
- Choose the styled image link that will appear on your site.
- Custom Redirect URL (Optional):
- Check the "Use custom redirect URL" box if you want patients to be directed to a specific page after submitting their pain map.
- When checked, an input field will appear where you can enter the full URL (e.g.,
https://your-clinic.com/thank-you). - If unchecked, users will be asked to close the page and return to the page where they clicked the button.
- Live Preview: At the top of the modal, you'll see a real-time preview of how your button or image link will appear.
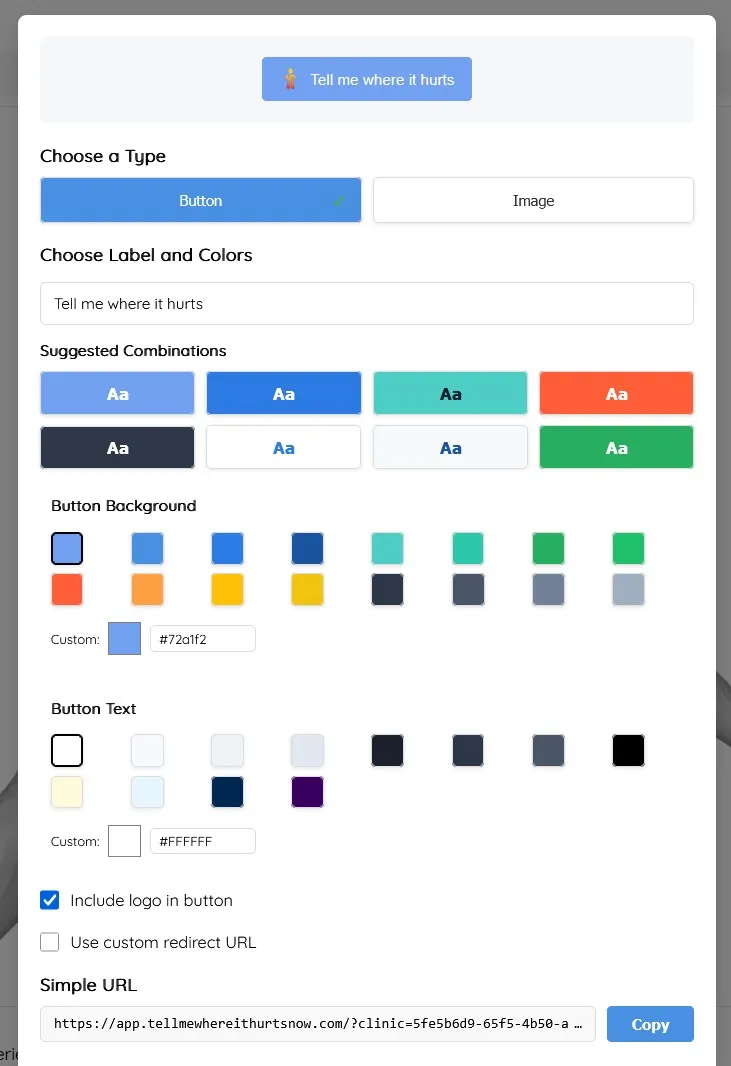
Fig 5: The Clinic Button Creator modal with customization options.
Get the Code:
- You have two options for retrieving your button code:
- Simple URL: A direct link you can use for emails or simple integrations. Click "Copy" to copy to your clipboard.
- Copy & Paste Code: Complete HTML code that creates your customized button. As you make changes, this code updates automatically to reflect your selections.
- Click the "Copy" button beneath the code box to copy the entire code snippet to your clipboard.
- You have two options for retrieving your button code:
Embed on Your Site:
- Paste the copied code snippet into the HTML source code of your clinic's website or patient portal page where you want the button/link to appear.
- Note: If you encounter issues with the button script on certain platforms, try the Image option instead, as noted at the bottom of the modal.
Integration Options
Choose the integration method that best fits your workflow. We offer multiple ways to integrate our pain mapping tool into your existing systems:
Simple URL
Quickly shareable link. Best for emails, documents, and direct website links.
Use for: Basic linking from anywhere online.
Embed Button
Stylish button for your website. Includes JavaScript for automatic redirect after submission.
Use for: Seamless website integration with a button.
Form Integration
Embed directly into Notion & Google Forms. Collect pain maps within your existing forms.
*Tutorial Coming Soon: Tutorials for Notion & Google Forms.
Advanced Integration Options
For developers and technical users, our tool provides advanced URL parameters that streamline the patient experience and integrate seamlessly with your existing systems.
Auto-Redirect with form Parameter
When integrating the tool with your patient management system, you can include a form parameter in the URL to enable automatic redirection after submission.
- How it works: When these parameters are present, users will see a different confirmation window after submission with a countdown for automatic redirection to the specified URL.
- Implementation: Simply add
&form=https://your-form-url.comto your button's URL. - Example:
https://app.tellmewhereitshurtsnow.com/?clinic=your_clinic_id&form=https://your-clinic.com/thank-you
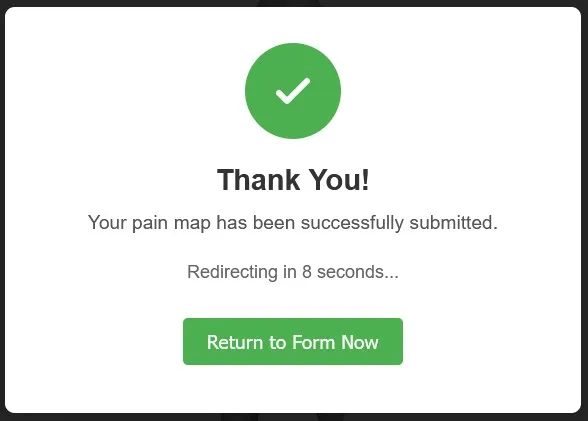
Fig 6: The auto-redirect confirmation window that appears when form parameter is used.
Pre-populating Patient Names with first_name and last_name Parameters
To reduce data entry errors and streamline the patient experience, you can pre-fill the patient's name directly in the URL.
- How it works:
- When both
first_nameandlast_nameparameters are included in the URL, the system will automatically associate the submission with that patient name. - If these parameters are not provided, patients will see a prompt asking for their name before submission (as shown in Fig 7).
- When both
- Implementation: Add
&first_name=John&last_name=Doeto your button's URL. - Example:
https://app.tellmewhereitshurtsnow.com/?clinic=your_clinic_id&first_name=John&last_name=Doe - Benefits:
- Eliminates patient data entry errors
- Ensures consistent naming conventions in your submissions database
- Simplifies the patient experience by reducing required input steps
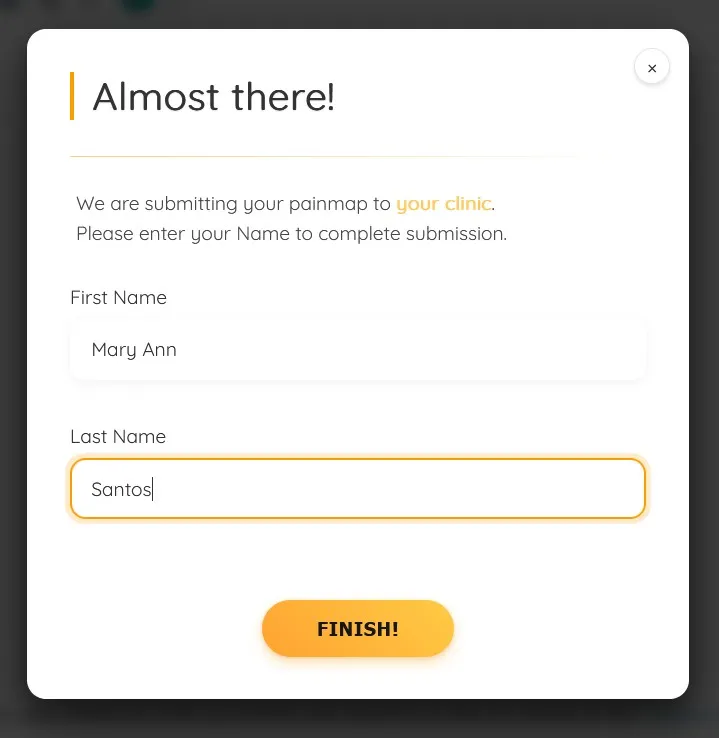
Fig 7: The name prompt window that appears if first_name and last_name parameters are not provided.
Combining Parameters for Complete Integration
For the most seamless experience, you can combine all parameters:
https://app.tellmewhereitshurtsnow.com/?clinic=your_clinic_id&first_name=John&last_name=Doe&form=https://your-clinic.com/thank-youThis creates a fully automated flow where the patient clicks your button, completes their pain map, and is automatically returned to your site without needing to enter their name.
Email Notifications
Stay informed when patients submit new pain maps with our email notification system. This feature is especially useful for busy clinics that want to be alerted as soon as a new submission arrives.
Setting Up Notifications
1. Access Notification Settings:
- Log in to your clinic account
- Go to your Account Settings page
- Scroll down to the "Notification Settings" section
2. Enable Notifications:
- Toggle the "Enable email notifications" switch to the ON position
- Enter the email address where you want to receive notifications
- Click the "Save" button
Note: You can use any email address for notifications—it doesn't have to be the same as your account email. This allows you to direct notifications to a dedicated inbox or to specific staff members.
3. Testing the Setup:
- Create a test pain map submission using one of your clinic's embeddable buttons
- Check the specified email address for a notification
Managing Notification Settings
You can change your notification settings at any time:
- Change Email Address: Click the "Edit" button next to your current notification email to update it
- Disable Notifications: Toggle the switch to the OFF position if you no longer want to receive email alerts
Pro Tip
Consider using a shared inbox or email alias (like painmaps@yourclinic.com) for notifications if multiple staff members need to monitor incoming pain maps. This ensures continuity of care even when specific staff members are unavailable.
Frequently Asked Questions (FAQ)
What happens if a patient submits multiple pain maps?
All submissions from the same patient are stored chronologically in their folder. This allows you to track pain progression over time. Each file is timestamped, making it easy to identify the most recent submission.
Can patients edit their submissions after they've been submitted?
No, once a pain map is submitted, it cannot be edited by the patient. This ensures the integrity of the data for clinical purposes. If a patient needs to update their pain map, they should create a new submission.
Do you offer white-labeling options?
Yes, Premium and Enterprise accounts can apply their clinic's branding to the pain mapping interface. This includes custom colors, logos, and domain masking. Contact our sales team for details.
Need Help?
If you encounter any issues or have questions about using the Clinic features, please contact our support team at support@tellmewhereitshurtsnow.com.